
A massive decrease in wifi speed can be seen when a laptop is plugged in for charging. This decrease in the wifi speed can be caused due to many problems. This can be caused by the wifi driver of the device or by the power settings of your laptop.
The first thing you could try to fix slow wifi in your laptop is by updating the wifi driver. If this doesn’t help you fix the problem, follow the methods below.
Also read: Wifi Keeps Disconnecting Windows 10 Fix
Fix Wifi Slow When Laptop Plugged In
As I have already said, the slow wifi speed can be caused due to wifi driver problem or the power settings. In my case, it was caused due to bad power settings. Here’s what I did to fix the problem
- Open the windows search. You can also use the shortcut CTRL+E to open it.
- Now click on Hardware and Sound.
- Open “Power Option.”
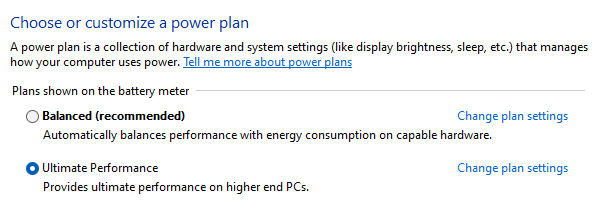
- In this menu, you will see different types of power plans.
- Usually, you will see a power plant already selected. In my case, my power plan was balanced. Click on change plan settings.
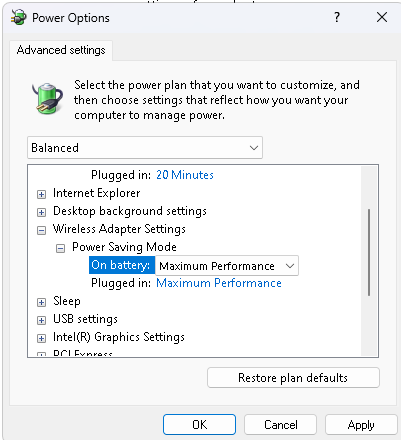
- Now Click on “Change advanced power settings.”
- Click “Wireless Adapter Settings,” then expand “Power Saving Mode.”
- Change the “Plugged in” setting to match the “On battery” setting, or you can choose maximum performance.
- Click on apply.
You can also try another method. That is to change the power settings from your current selection to another plan. In my case, I changed from Balanced to Ultimate Performance. It may be different for different laptops, so look for the change in speed after changing into different modes.
If this method doesn’t fix your slow wifi problem when the laptop is plugged in, You can try to change the driver’s settings. To do this, follow the methods below.
- Right-click on the start button and select Device Manager from the options. You can also search for Device Manager in windows search.
- Click on the Network Adaptors to expand it.
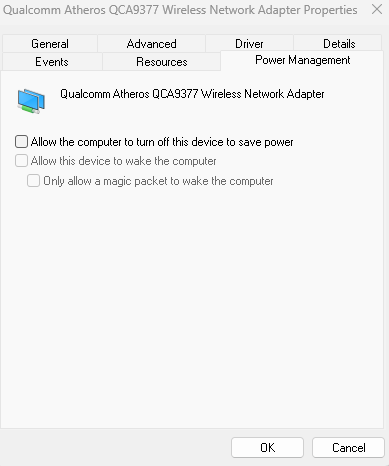
- Right-click on the Wireless Network Adapter and click on Properties.
- Select Power Management.
- Untick “Allow the computer to turn off this device to save power.”
- Click OK. Close the device manager and reboot the system.
If you find a network adapter named Microsoft Wi-Fi Direct Virtual Adapter under the network adapters. Right-click on it and click on properties. Under the driver tab, click on disable. Many users facing this issue have been able to fix the problem by disabling the Microsoft Wi-Fi Direct Virtual Adapter.